Deploy a C# & .NET Core Website to Kubernetes in 5 Minutes with Launchpad by Jetpack.io
Deploying to Kubernetes is Hard
Maybe you can relate: We've finished coding a website, and we're ready to deploy. We know we want to deploy to Kubernetes, to take advantage of it's industrial-scale hosting, automatic load-balancing, fault tolerance, scaling, and more.
But deploying to Kubernetes is hard. Now we have to trek into the land of containers, pods, services, ingress, and yaml. Ugh. "I just finished the website. I don't want to read a book just to make it work." Kubernetes has too many options and concepts: Pods, Deployments, ReplicaSets, Services, ConfigMaps. Oh my! And the Kubernetes yaml file is really confusing and specific. I really wish it was easier to deploy a website to Kubernetes.
Why Launchpad by Jetpack.io
Launchpad is a zero-DevOps solution for deploying to Kubernetes. Launchpad takes your code, packages it up in a container, and publishes it to Kubernetes. Launchpad also creates a public URL so the site can be routable from the internet, and can stream application logs back to your terminal. All of the toil of Kubernetes melts away, and we can focus on our application.
In this tutorial, we'll build an ASP.NET Core website in C#, configure it for Launchpad, and deploy it to Kubernetes -- all in 5 minutes.
I. Building a C# and .NET App
In this example we'll quickly scaffold an ASP.NET Core MVC application. You could swap out these steps with use an existing ASP.NET Core web site, or scaffold a site using Razor Pages, Web API, or Minimal APIs.
1. Open Visual Studio
2. If the new project dialog doesn't open automatically, choose File -> New Project.
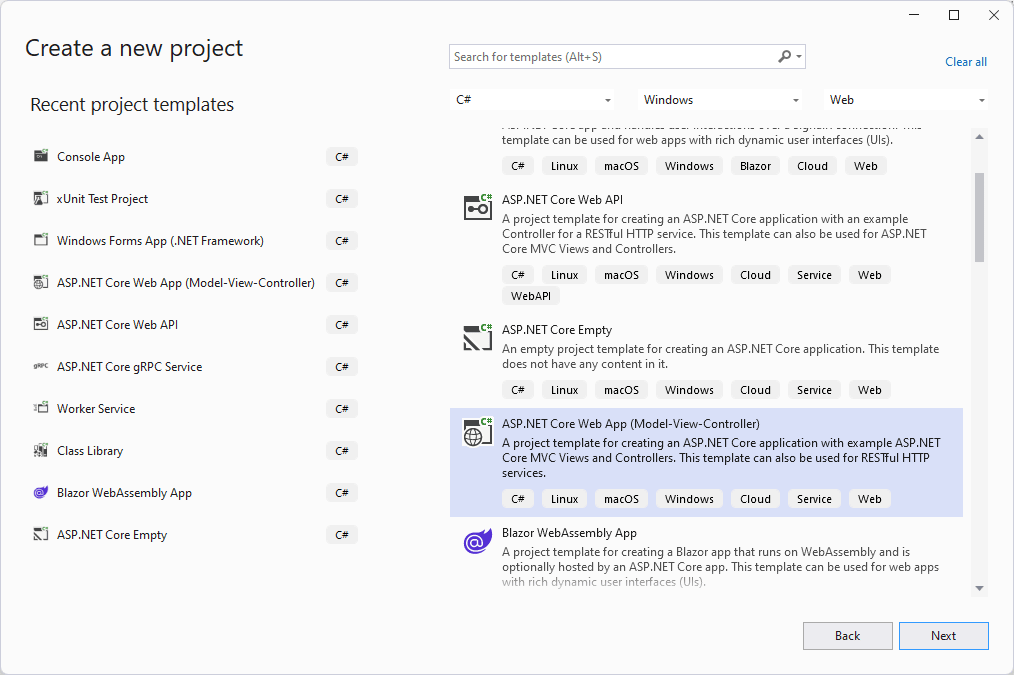
3. Choose ASP.NET (Model, View, Controller) and click next.
4. Choose a good name for this project, and save to a convenient directory.
5. In the Additional Information section, check Enable Docker then click Create.
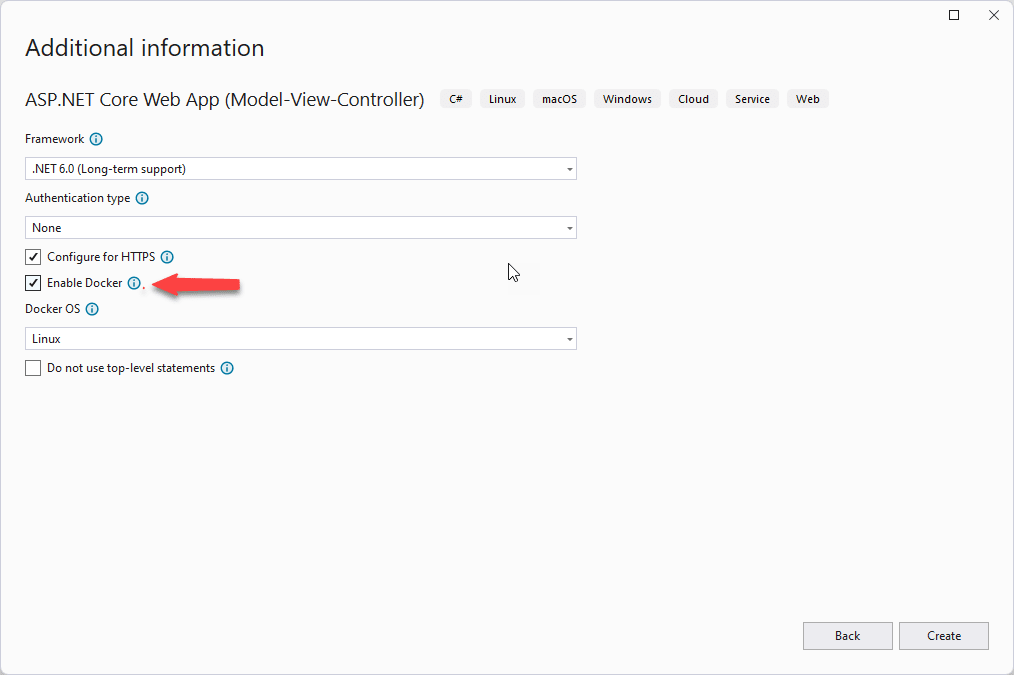
You must have Docker Desktop installed for this function to work correctly.
Now we have a regular ASP.NET website. Feel free to customize this site to meet your needs.
II. Configure the App for Launchpad
Launchpad assumes your web server is running on port 8080, but the default project in ASP.NET runs on port 80. In this section we'll change the Dockerfile to run the web site on port 8080.
1. In the Solution Explorer, open Dockerfile.
- Remove the 2
EXPOSElines and add a newEXPOSEline:
- EXPOSE 80
- EXPOSE 443
+ EXPOSE 8080
- Just under the
EXPOSEline, add the environment variable telling ASP.NET Core to run on port8080
EXPOSE 8080
ENV ASPNETCORE_URLS http://+:8080
The + tells ASP.NET to listen on all interfaces rather than just localhost.
4. Save and close the Dockerfile.
5. In Windows Explorer, move the Dockerfile from the project directory up 1 level to the Solution directory.
Jetpack.io assumes the Dockerfile is in your root directory.
III. Initialize the project with Launchpad
Launchpad needs some initial configuration to understand the ASP.NET web server. We need only do this once per website.
1. To install the Launchpad CLI, open a terminal and run
curl https://get.jetpack.io/launchpad -fsSL | bash
Launchpad CLI works on Linux, macOS, and on Windows via WSL2.
2. Login to Launchpad CLI:
launchpad auth login
Logging into Launchpad allows you to deploy to the Jetpack.io Kubernetes cluster. You can also run on your own cluster in your Azure, AWS, GCP, or private cloud account.
3. Initialize the project for Launchpad:
launchpad init
This wizard interviews you and configures the Launchpad deployment strategy to match your application.
4. Answer that **Yes, this is a web server**. This tells Launchpad that we want to accept inbound traffic.
If we were building a scheduled cron job or a function that drained a queue, we could answer no.
- Finish the wizard, and Launchpad CLI automatically generates an appropriate
launchpad.yamlfile. You should commit this to source control.
IV. Deploy to Kubernetes using Jetpack.io
Now that the project is configured for Launchpad, deploying is really easy.
1. Open a terminal in the directory with the Dockerfile and launchpad.yaml file.
2. Deploy to Kubernetes:
launchpad dev
Now Launchpad makes the deployment really simple. Automatically it will:
- Build the Docker image
- Push the image to a private registry
- Schedule the necessary Kubernetes resources
- Create a publicly routable URL to test the website
- Setup port-forwarding from your local machine
- Stream application logs back to the terminal
3. Test the website:
In the console output will be the publicly routable URL. Click this URL to view the web page.
Launchpad also sets up port-forwarding, so you can also browse to http://localhost:8080/ to view the page.
Well that was easy
It's easy to deploy an ASP.NET app built with C# to Kubernetes with Jetpack.io. In this tutorial we scaffolded a website, configured it for Launchpad, and used Launchpad to deploy to Kubernetes. Launchpad is a great zero-DevOps solution for deploying to Kubernetes.